Note: this looks like a lot of instructions, but even stopping to take photos, doing this single side only took about 3 minutes. It way less complicated than all these words would imply!
- Always start with a clean, dry surface free of dust and dirt. Let newly painted surfaces cure for at least a week (2-4 is even better) and give them a light sanding, being sure to clean off the dust afterwards. If applying outside, the temperature needs to be at least 50 degrees when you apply the decals and should stay above freezing for a couple of days after. So if you’re in a cold climate take it inside for a couple of days if possible or wait until spring to apply.
-
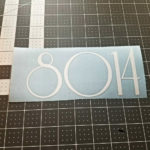
What it looks like straight out of the envelope. White numbers have a blue backing so you can see them. Your mailbox numbers will arrive sandwiched between a clear-ish transfer tape and a backing. When you are ready to apply them, take a credit card or something similar and squeegee or “burnish” the whole thing. This has already been done once but it tends to lift a bit here and there and redoing it will help it to adhere and make the process smoother.
- To make sure that your surface is cured, cut off a small bit of the transfer tape that doesn’t have any vinyl (or use the sample flower that is usually enclosed), burnish it onto your surface and see how it acts when you peel off the transfer tape. If it lifts the paint off your surface, you don’t have good adhesion and you’re going to end up with a mess if you try to apply the decal. If it’s newly painted, give it another week to cure. If it’s an old finish, you’ll probably need to sand it down and repaint it (and then wait for the paint to cure).
-

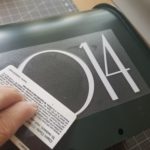
Peeling off the backing S-l-o-w-l-y remove the backing making sure that none of the decal stays on the backing. It’s best if the decal is face down and you pull the backing away from the decal. If your mailbox numbers want to stick to the backing instead of the transfer tape, turn it back over and re-burnish that area with a fingernail or credit card. You can touch the sticky part of the transfer tape as much as you want but avoid touching the sticky part of the decal. The more intricate the design, the slower and more carefully you’ll need to do this. Sometimes a bit of the backing will come off with the design. You can pick this off carefully. I use a dental pick but a tooth pick or fork tine will also work. It’s much less likely to happen if you apply the decals as soon as you receive them.
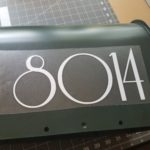 Apply the decal from starting on one side (or from top to bottom) and taking care not to let the other side touch your surface before the previous sections have been applied. It sounds a little complicated but the idea is that if your number is 8014 you don’t want the 8 and the 4 stuck down with the 01 humped up in the middle.
-
Burnish it down onto the mailbox Once the entire decal is applied, again use your credit card to burnish the decal onto the surface, making sure that good contact is made between the surface and the vinyl.
-
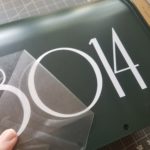
Peel off transfer tape S-l-o-w-l-y remove the clear transfer tape at a sharp angle, making sure that all the vinyl remains on the surface. If a piece of vinyl starts to come up with the transfer tape, re-burnish the vinyl back on to your surface and then keep going. If it’s being particularly stubborn, just let it sit for a couple of hours. Even 5-10 minutes will make a difference so go on ahead and fix yourself a nice cold drink before you pull the tape off. Once the vinyl adhesive has had a little bit of time to set up it will be stronger than the transfer tape adhesive and the tape will come right off.
- Celebrate all your hard work* with that drink you just fixed!

*It’s not actually hard at all, but we’re always in favor of a celebration.